Smush: Optimizing images on WordPress
Not all images are valid to be used on a website or blog. It's necessary that they meet some requirements to ensure that they don’t affect the server performance, load time or the visitor experience. Usually a website with a lower load time implies get a higher conversion/purchase rate, most of us don't like wait for a website to load.
The first two advices for the correct use of images are:
1 - Avoid to use images with a weight higher than 100 KB.
2 - Use images with the resolution you will need on your website. A higher resolution than needed will result in a higher weight and increase the page load time.
But sometimes is not possible to use optimized images. For those situations we want to use the plugin Smush Image Compression and Optimization. This plugin has a free and a premium version, if your website has a lot of images it may be interesting to pay for the premium features.
In this guide we will use the free plugin option.
Step 1. Plugin installation
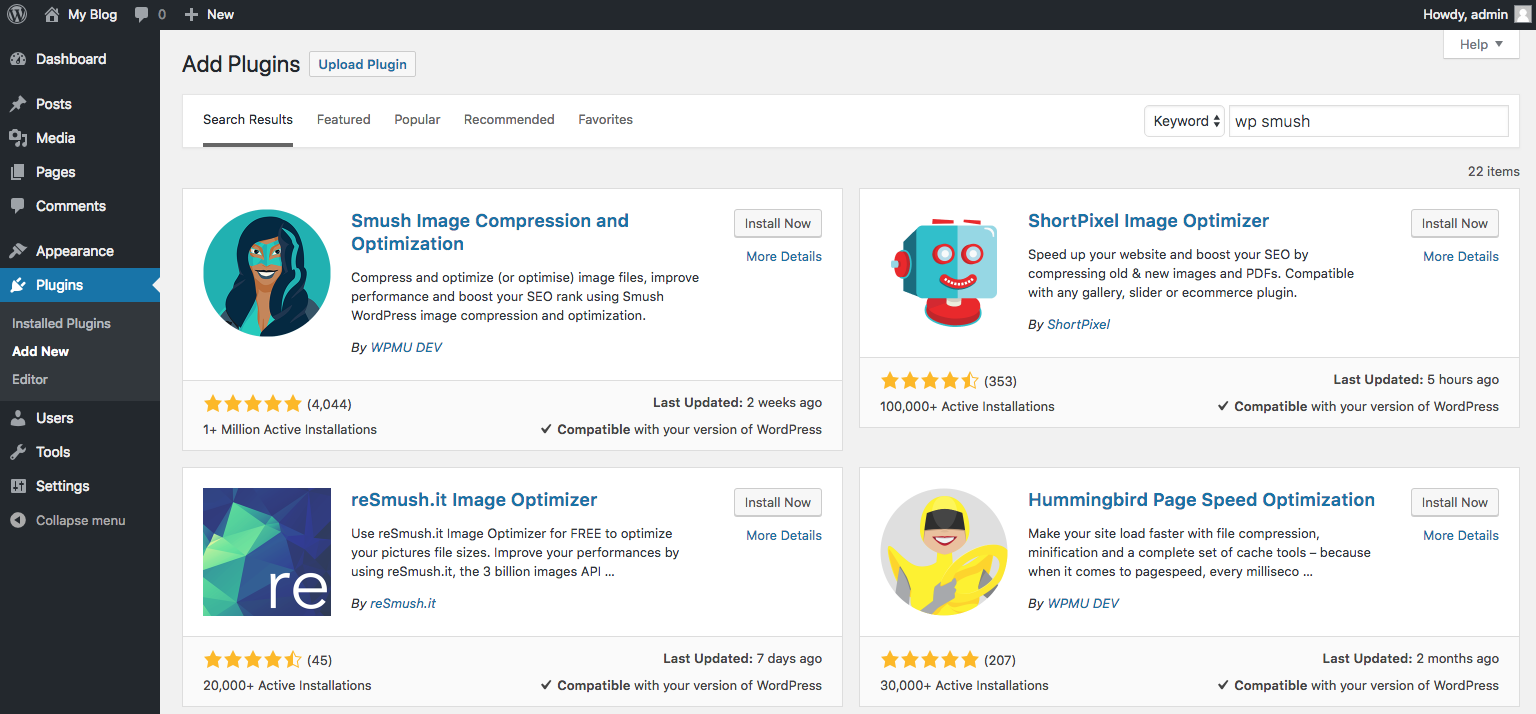
To install plugins you will access to the Wordpress management area and go to Plugins > Add New, search wp smush and the plugin will appear. Click Install now and after the installation click Activate.

Step 2. Plugin configuration & use
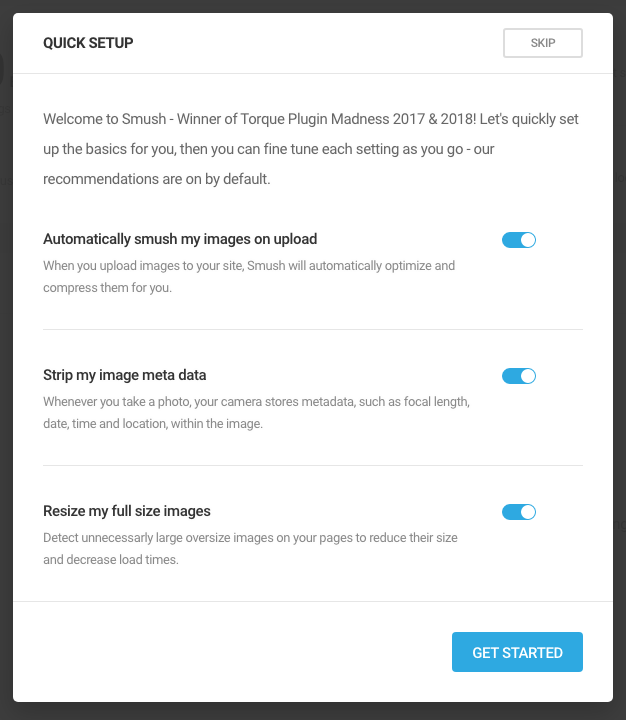
After the plugin configuration you will see the new screen, where you will enable the 3 options and click “Get started”.

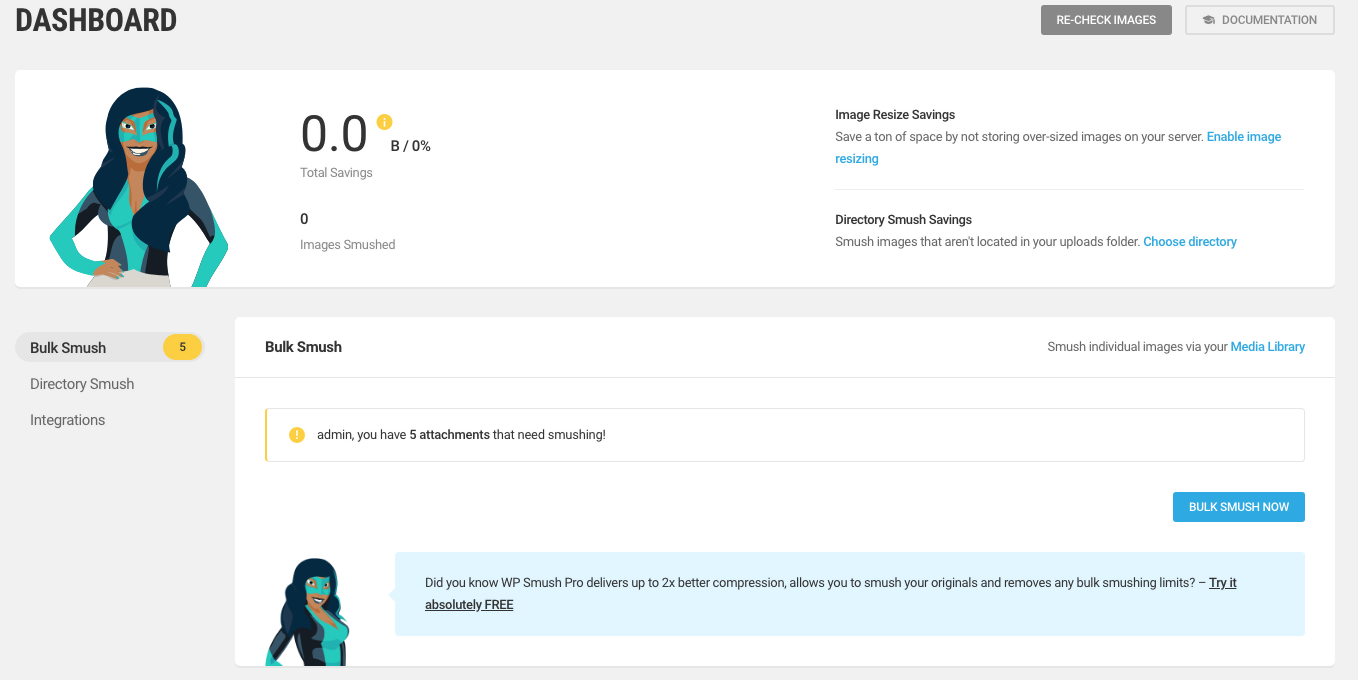
Now the plugin management screen will appear with all options enabled. You will also see the number of files that require optimization and you can start that process by clicking the Bulk smush now button.


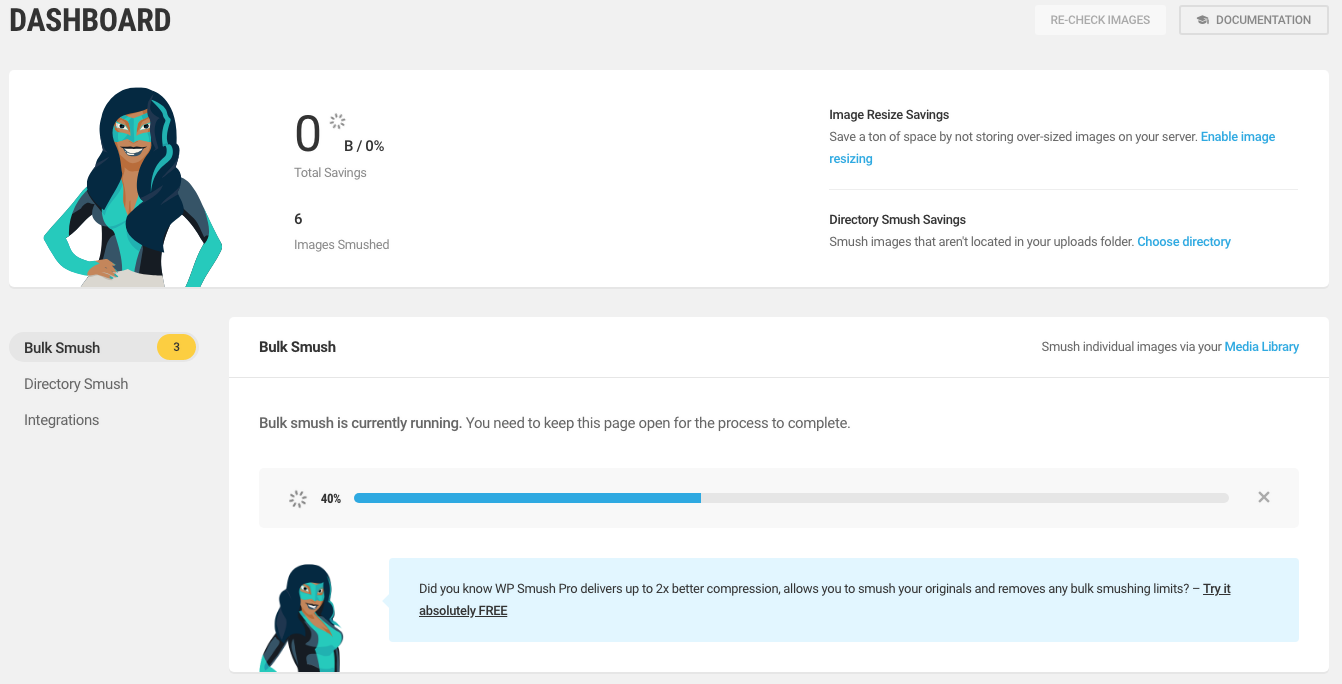
When the optimization ends there will appear a message. If there are a lot of images this process may take a long time to end.


