How to use a domain for my blog at wordpress.com
To be able to use your Wordpress.com blog on DonDominio, you must follow these simple steps:
- Your WordPress.com account must be Premium, you will find more information at: Premium Features.
Register your domain:
You will have to register your domain, choose the name you want to register, check if it is free and finish the purchase (remember that you will have to wait for the domain to be active, it can take between 12 and 72 hours, depending on the extension of the domain).
You will have to indicate the following DNS when registering your domain:
NS1.WORDPRESS.COM
NS2.WORDPRESS.COM
NS3.WORDPRESS.COM
If you already have your own domain or have already registered it:
Now that you already have a domain, you will need to associate it to your blog on wordpress.com, to do this, you must edit the DNS of the domain, you can do this by following the steps in this help: Modify DNS
The DNS to indicate will be:
NS1.WORDPRESS.COM
NS2.WORDPRESS.COM
NS3.WORDPRESS.COM
Please note that DNS changes can take between 12 and 24 hours to be displayed, until then it will not work. Now we just need to tell Wordpress that we want to use the new domain for our blog, to do this:
Set up your wordpress.com account.
1- Login to Wordpress.com with your account.
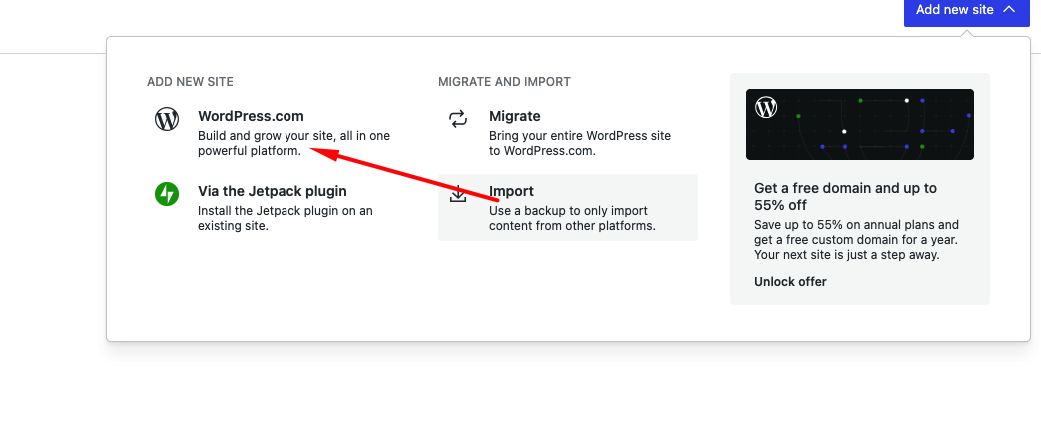
2- Click on ‘Add a new site’.
 3- Click on ‘WordPress.com’.
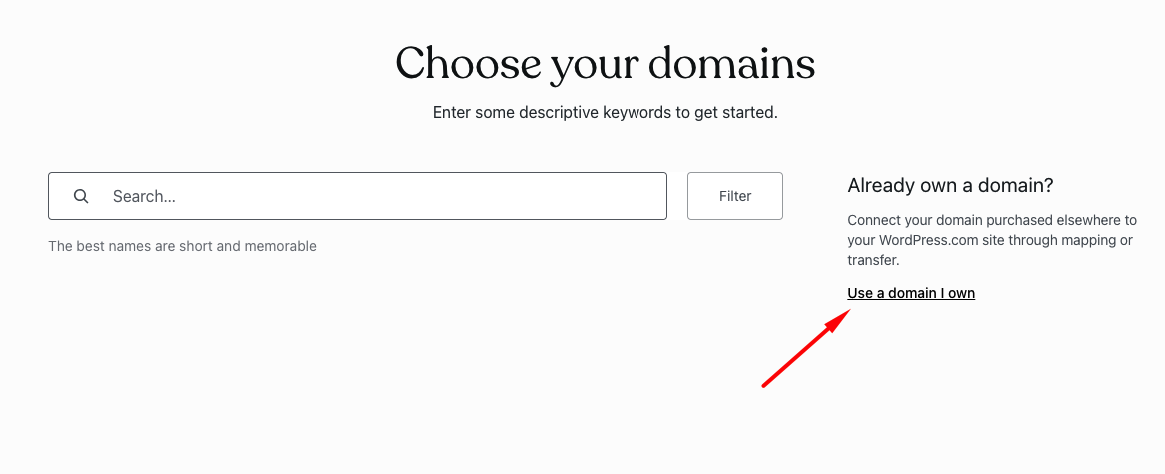
 4- On the next screen, instead of specifying the domain, click on ‘Use a domain I already own’.
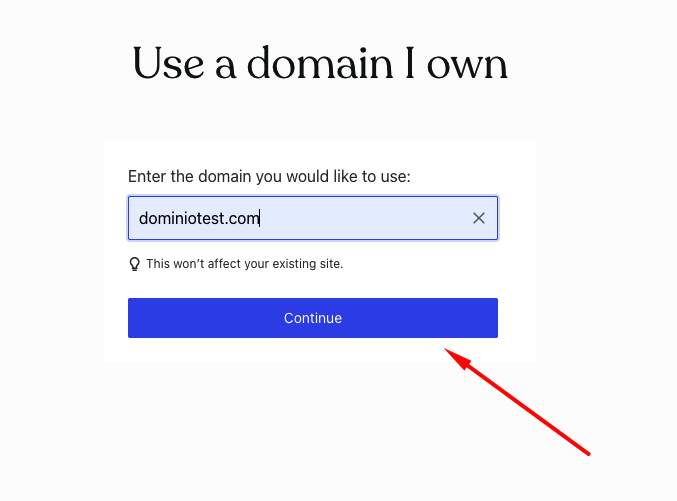
 5- Now we will indicate the domain and click on ‘Continue’.
 6- In the section ‘Connect your domain’ and click on ‘Choose’.
 7- If we don't have a premium plan yet, this is the moment to buy it.
8- That's it!
Now just wait for WordPress.com to update its records (don't be impatient, it can take from a few minutes to a few days) and your blog will be up and running under your new domain.


